555 Music Sequencer
22 Apr 2019My good friend Karim Nasr and I worked on this together for an electronic class at Miami Dade College.
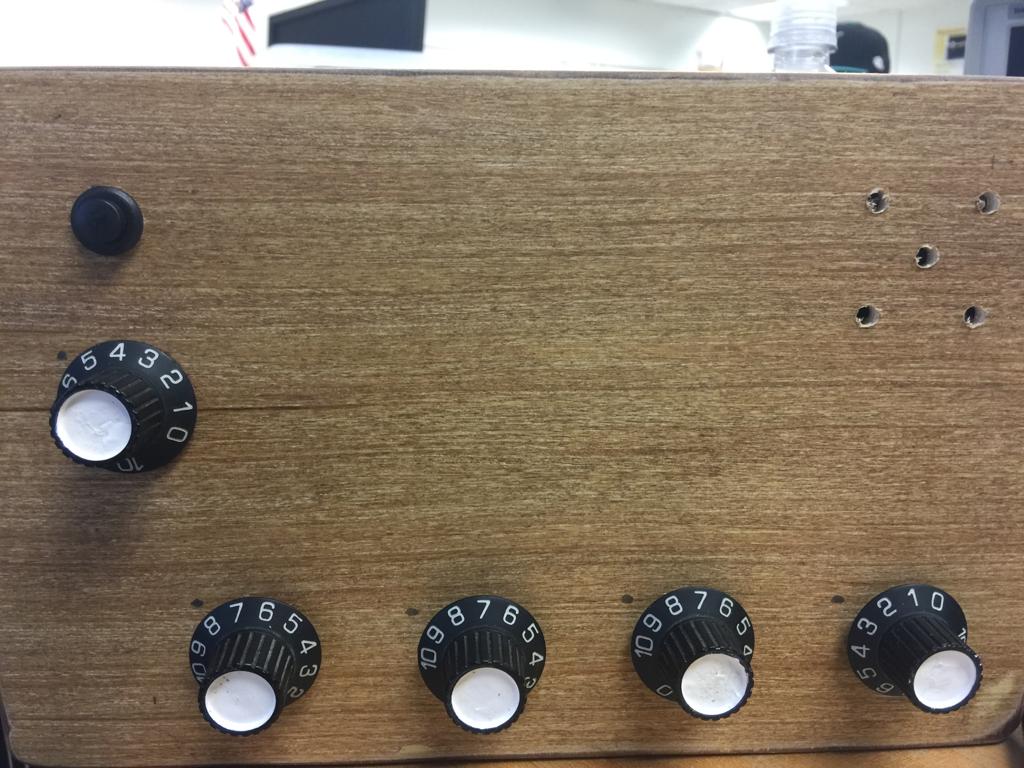
A music sequencer is device that plays back a pre-set sequence of sounds/notes/pitches/samples in an order set by the musician. This sequencer plays a series of four pitches each with the same duration. The tempo (the speed that the sequencer cycles) is determined by the top left potentiometer. Each of the four pitches are set by the four potentiometers along the bottom of the case.

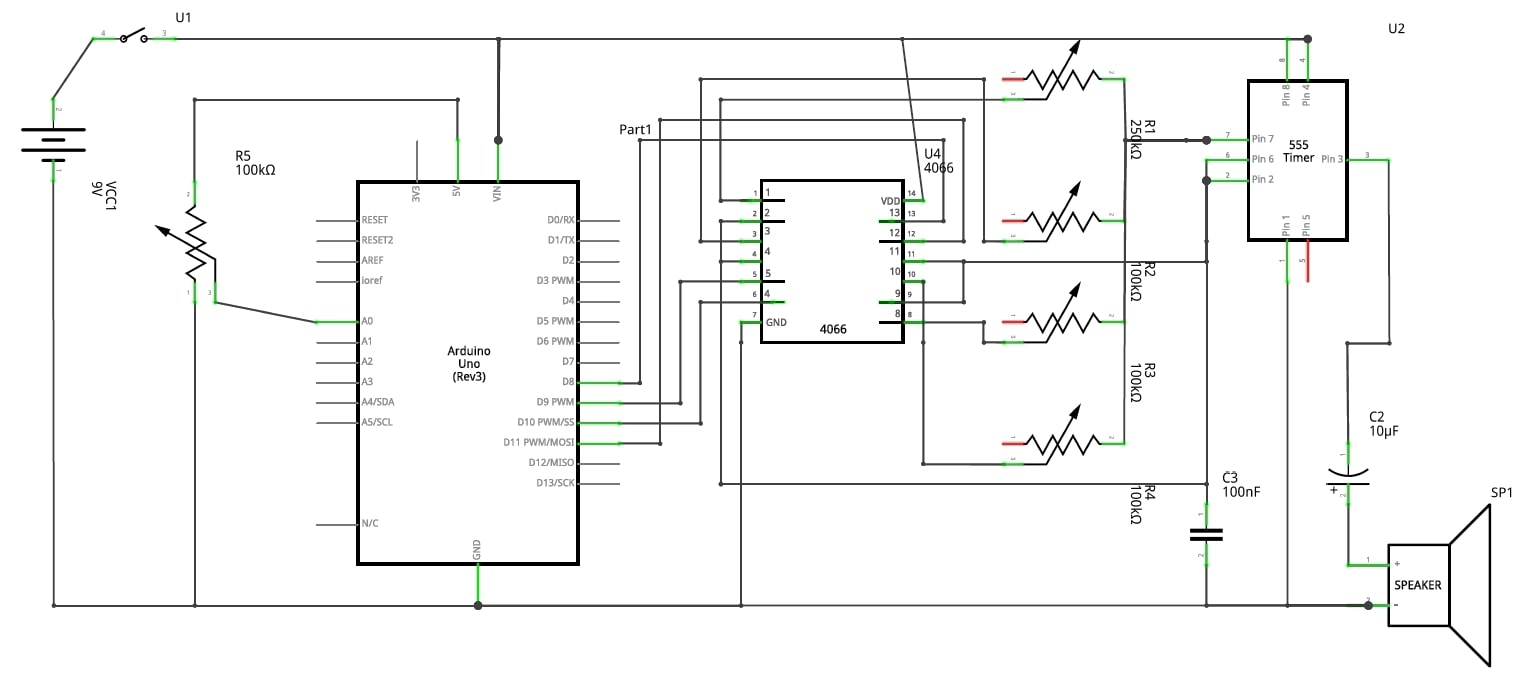
This project’s purpose is to utilize the 555 timer IC in conjunction with a bilateral switch IC to get an input frequency from the Arduino UNO to cycle through 4 output frequencies that are modulated by potentiometers to change the pitch of the notes, thus creating a music sequencer.
Parts List
* [LM555 Timer](https://www.ti.com/lit/ds/symlink/lm555.pdf)
* Arduino UNO
* [CD4066 Quad Bilateral Switch](https://www.ti.com/lit/ds/symlink/cd4066b.pdf)
* 100 kOhm potentiometer x1
* 250 kOhm potentiometers x4
* 8 Ohm speaker ---
 ^typo it should be R1=100k and R5=250k
Although there are digital elements in the sequencer, the sound generated is analog. Sound generation is handled by the 555 in astable operation. The frequency is set by the RC series circuit. If the 555 is the voice, then then the Arduino would be the brain.
    int sensorPin = A0;
    int ledPin = 13;
    int sensorValue = 0;
    int counter = 0;
    int A = 8;
    int B = 9;
    int C = 10;
    int D = 11;

    void setup() {
      pinMode(ledPin, OUTPUT);
      pinMode(A, OUTPUT);
      pinMode(B, OUTPUT);
      pinMode(C, OUTPUT);
      pinMode(D, OUTPUT);
       Serial.begin(9600);
    }

    void loop() {
      sensorValue = analogRead(sensorPin);
      Serial.print("\n sensor = ");
      Serial.print(sensorValue);
        Serial.print("\t counter = ");
      Serial.print(counter);

      switch(counter){
        case 0 :
        digitalWrite(A,HIGH);
        digitalWrite(B,LOW);
        digitalWrite(C,LOW);
        digitalWrite(D,LOW);
          break;
        case 1:
          digitalWrite(A,LOW);
          digitalWrite(B,HIGH);
          digitalWrite(C,LOW);
          digitalWrite(D,LOW);
          break;
          case 2:
          digitalWrite(A,LOW);
          digitalWrite(B,LOW);
          digitalWrite(C,HIGH);
          digitalWrite(D,LOW);
          break;
          case 3:
          digitalWrite(A,LOW);
          digitalWrite(B,LOW);
          digitalWrite(C,LOW);
          digitalWrite(D,HIGH);
          counter = -1;
          break;
      }
    counter++;
      delay(sensorValue);
    }

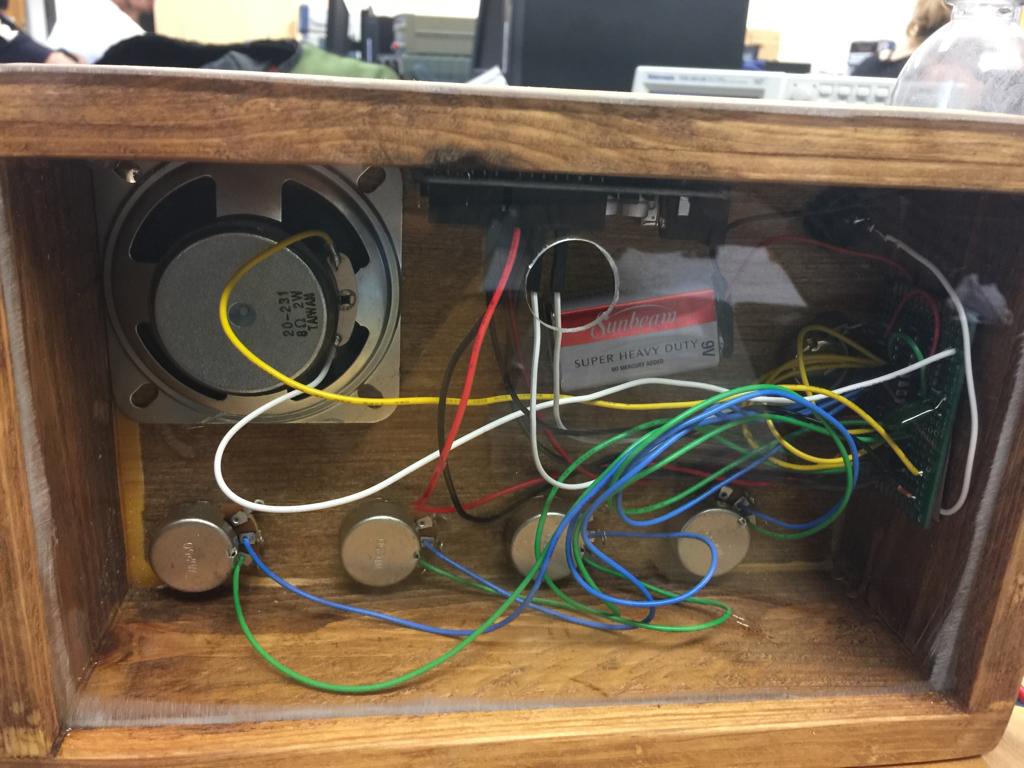
I made the case with reclaimed pallet wood, 1/4” plywood, and acrylic. It is fastened using dowels and a dado for the removable back.